
Bush IBX200 Internet TV
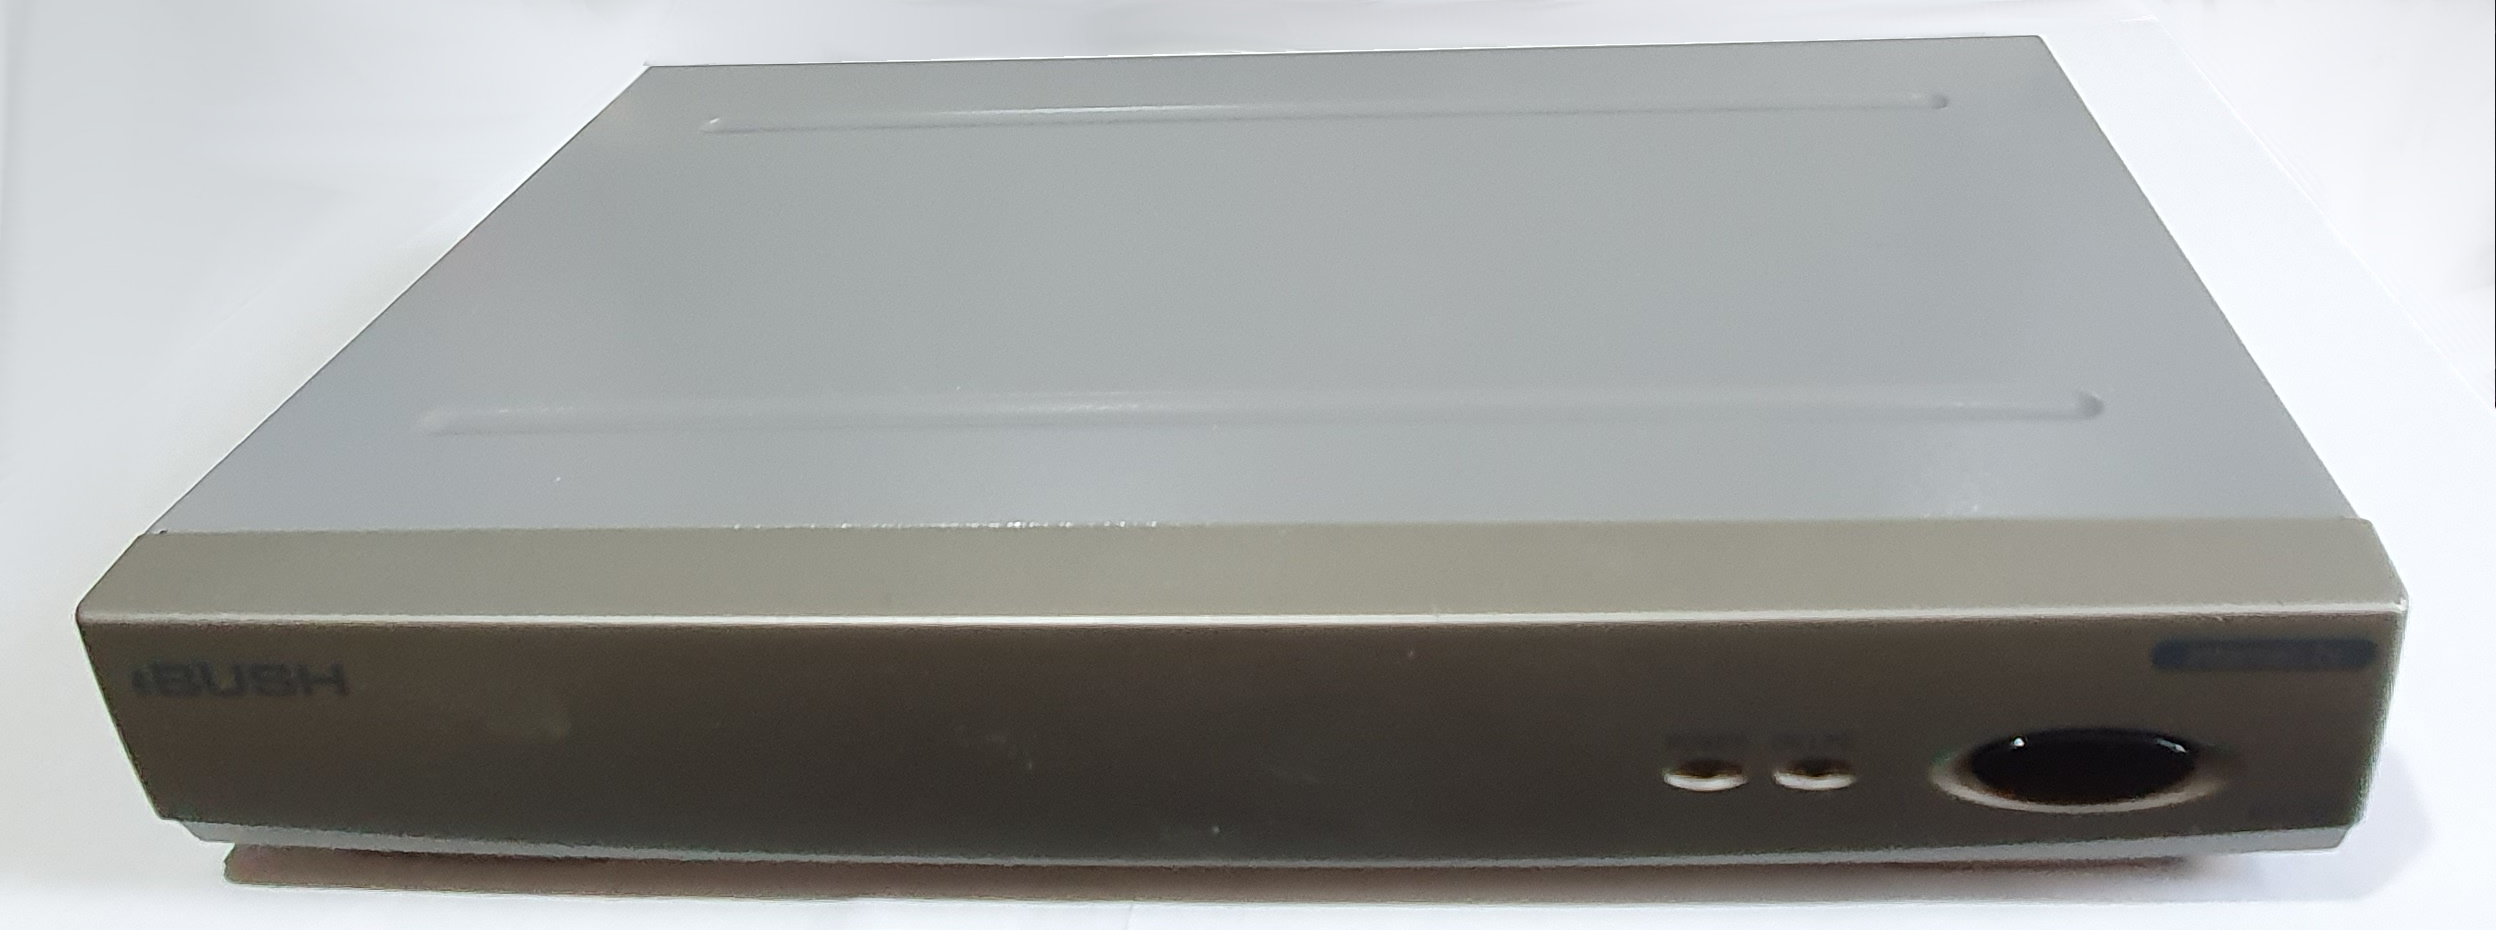
In the early days of the internet when computers were still not commonplace, accessing the internet could be done on your TV. The IBX200 was one of a range of machines manufactured by Pace but badged Bush.
Hardware
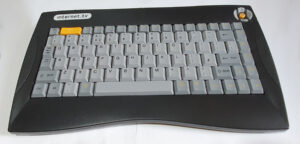
The keyboard of the IBX200 is about the size and shape of an ordinary PC keyboard without the number pad or arrow keys.
A big yellow button is included to switch the device on.
Talking of switching the device on, it seems that the device is always switched on, just not the screen. This, of course, means that the device is instantly available when the big yellow button is pressed.
There are a couple of lights on the front of the box for power (as explained above) and online – which lights when the phone line is in use. This device was released at the time when the internet was accessed by dialup modem. It was important to know when a device was online (in the UK at least) because every minute online tied up the house phone and cost money.
The printer port on the back is an oddity for a set-top box. Why would such a device want to be plugged into a printer? Well, the printer port could be plugged into a parallel-port Zip-100 drive.
Summary
- Processor: 48MHz ARM7500
- RAM: 8MB
- Infrared keyboard
- 2 SCART ports
- Parallel DB25 printer port
- RJ-11 telephone connector
Software
The IBX200 runs RISC OS NC 5.13 but this is normally hidden from the user by an interface with big chunky icons suitable for viewing on a TV set at a distance.
The settings page is the only option I can use since I don’t have a land line phone. I’ll update this page if I ever manage to fake one (I believe this is possible).
This page is unexciting. You can change a few things like the printer type but you can’t alter the ISP settings from there; you’re expected to use Bush Internet. You can, however, change this by typing (from the main screen) ‘mirror1357’. Different models have different secret incantations. See Chris’ Acorns page for details.
There is another interesting incantation – whodunnit. That shows a picture of the development team and their names.
As I mentioned, I can’t see anything but the settings page, the only other option being Internet. That instantly tries to dial up the preset internet service provider (Bush Internet). Since dialup is not an option for me I can’t get past it to the web browser.
It is possible, however, to get a RISC OS command line. Just hold down the shift key when you power the IBX200 up. By default the IBX200 uses an overscan mode, so the prompt is probably off the top of the screen. If you hit Ctrl-V then Ctrl-L it’ll switch to a more usable screen mode. You’ll need to press return to get another prompt, though. From there you can start BBC BASIC by typing ‘BASIC’. Remember that BBC BASIC expects all keywords to be in uppercase.
Running RISC OS
The IBX200 runs RISC OS NC 5.13 but this is normally hidden from the user by the big chunky interface. Because this is a cut-down version of RISC OS, it’s possible to get a * command prompt as easily as powering it up with the shift key pressed. From there you can even start BBC BASIC.
More usefully, the IBX200 contains an IZipFS driver for a parallel port ZIP100 drive. According to Chris’ Acorns site, you can type “zipdebugging” from the main menu to enable it.
To create a suitable Zip image, I actually followed the instructions on retro.m1ner.co.uk at the time. You will need to change a few things, so here is a summary of what I did….
According to the instructions, you need the Argo drivers on a ‘donor’ computer and copy some modules and other stuff onto it. I plugged my parallel port drive into an A3010 but note that it does not contain a sufficiently new version of RISC OS, but it does drive the drive.
Create the following directories on the Zip disc: Modules, Resources.
I used an emulated A7000 to get the actual modules and resources that I needed. I used !Zap (as suggested in the guide) to save the modules.
You need to extract the following to the directory called ‘Modules’ on the Zip disc: DisplayManager (as DisplayMan), DragASprite (as DragASpr), Filer, FilerSWIs, Pinboard, ResourceFiler (as ResourceFi), TaskManager (as TaskMan), TaskWindow.
You need these resources from ResourceFS, just drag and drop them into the ‘Resources’ directory on the disc: Display, Filer, Pinboard, ResFiler, ResourceFS, Switcher, TaskWindow. Also Sprites, Sprites22 and Tools.
You also need !System and !Scrap from the RISC OS 3 Application discs. You might want to also take a copy of the standard RISC OS applications at stick them in ‘Apps’.
Note that the RISC OS desktop needs a mouse and the IBX200 doesn’t even emulate one. The instructions recommend keyrat. It works, but !Warfarin is more configurable, I recommend copying it into the Apps directory. In order to configure it to use keys [ ] \ as the mouse buttons (when holding Alt), you need to edit its !Run file to look like the following:
IconSprites <Obey$Dir>.!Sprites
|
| Please note:
| The five values given here are INTERNAL KEYCODES.
| See page 1-156 of the RISC OS PRMs.
| If any are missing or incorrectly defined they default to:
|   &5E, &60, &1F, &20, &21
| The keys defined below are [ ] \ (press together with Alt)
SetEval Warfarin$Fake1  &5E
SetEval Warfarin$Fake2  &60
SetEval Warfarin$Left   &31
SetEval Warfarin$Middle &32
SetEval Warfarin$Right  &33
RMEnsure Warfarin 1.11 <Obey$Dir>.Warfarin
RMReInit Warfarin | Allows value changes to this file to be recognised
Note that the mouse can be moved using Alt and the arrow keys (I don’t think this s configurable).
The usual !Boot isn’t what’s run first from the disc, you’ll want a file called ‘Auto’ instead. It should be an Obey file containing:
Set Filer$Path          IZipFS:$.Resources.Filer.
Set ResFiler$Path       IZipFS:$.Resources.ResFiler.
Set DisplayManager$Path IZipFS:$.Resources.Display.
Set Pinboard$Path       IZipFS:$.Resources.Pinboard.
Set Switcher$Path       IZipFS:$.Resources.Switcher.
Set TaskWinRes$Path     IZipFS:$.Resources.TaskWindow.
RMLoad IZipFS:$.Modules.FilerSWIs
RMLoad IZipFS:$.Modules.Filer
RMLoad IZipFS:$.Modules.ResourceFi
RMLoad IZipFS:$.Modules.DragASpr
RMLoad IZipFS:$.Modules.DisplayMan
RMLoad IZipFS:$.Modules.TaskMan
RMLoad IZipFS:$.Modules.Pinboard
RMLoad IZipFS:$.Modules.TaskWindow
IconSprites IZipFS:$.Resources.Wimp.Sprites
ToolSprites IZipFS:$.Resources.Wimp.Tools
Desktop -file IZipFS:$.DeskStart
That then starts the RISC OS desktop with a DeskStart file (type Desktop). That should contain:
WimpMode 12
Filer_Boot IZipFS:$.Apps.!Paint
Filer_Boot IZipFS:$.Apps.!Draw
Filer_Run  IZipFS:$.Apps.!Warfarin
Filer_Run  IZipFS:$.Resources.!FreeMem
Filer_OpenDir IZipFS:$
AddTinyDir IZipFS:$
This gives you a working RISC OS desktop but what you can then do with it, I haven’t worked out. I ran !Patience from the applications disk but no other games I tried yet have worked. I’m working on it.
Once you have a disc prepared, you need to type “zipdebugging” on the IBX200 main screen to enable your Zip drive. You will just see it redraw the screen when you type it correctly. At this point it will have set the printer type to something invisible to the setup screen and when restarted it will boot from the drive.
You can download a copy from the IBX200 resources.